Neon Third Brake Light Install
 This information applies to any
pickup owner which would like the added safety of a state-of-the-art third brake
light unit. This swap works best in a truck box outfitted vehicle, but with
some inginuity the light unit could be installed almost anywhere on a pickup.
It would even work in a canopy application as the Center High Mount Stop Light
if desired.
This information applies to any
pickup owner which would like the added safety of a state-of-the-art third brake
light unit. This swap works best in a truck box outfitted vehicle, but with
some inginuity the light unit could be installed almost anywhere on a pickup.
It would even work in a canopy application as the Center High Mount Stop Light
if desired.
GENERAL INFORMATION The unit used in this installation was
found in a junkyard off of a '95-up Ford Explorer or Mercury Mountaineer. The
unit itself is wide and slender, making it perfect for nearly any vehicle.
Light output from the neon tube is the highest available, stronger than even the
largest LED light units seen on many of today's newer vehicles. The light
system consists of two parts; the light itself (including red lens) and a small
transformer unit, which converts the vehicle's 12 volts into a much higher
voltage--causing the neon tube to illuminate.
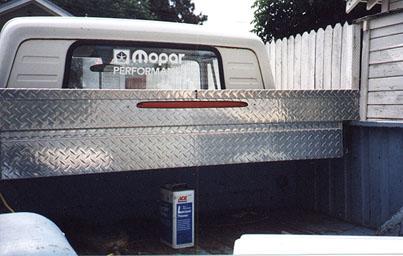
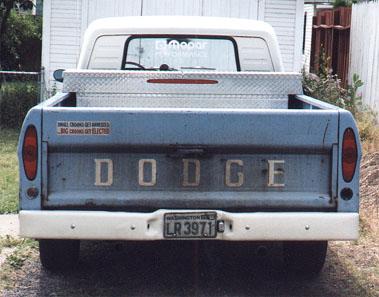
 - Rear View
of `67 D-100 with light installed.
To give a basic idea of how well the light works when installed properly, the
light places a red glow across the entire remaining six feet of pickup bed on
the example truck along with 20ft behind the bumper at night. This is one
bright CHMSL!
- Rear View
of `67 D-100 with light installed.
To give a basic idea of how well the light works when installed properly, the
light places a red glow across the entire remaining six feet of pickup bed on
the example truck along with 20ft behind the bumper at night. This is one
bright CHMSL!
 |
|---|
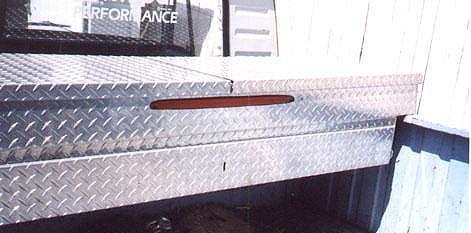
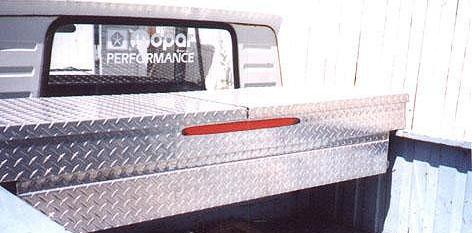
| In the above photo, the light is off. Below, the third brake
light is on, glowing a bright red visible even in daylight. |
 |
|---|
When getting the light unit from your favorite late-model vehicle boneyard, ask
them for a `95 and up Ford Explorer or Mercury Mountaineer Third Brake Light.
The unit in this example was purchased for $65 with the transformer. You may
end up having to pay more for yours. Be sure to get the little connector and
some extra wire from the donor vehicle for splicing later. Only two wires run
the unit, one is a ground (black) and the other is power (green). Both of these
wires plug into the converter via a small grey plastic connector.
INSTALLING THE THIRD BRAKE LIGHT SYSTEM To install this light, one
must locate a good place for the light tube and the converter. A dual lid crossover
truck box is an excellent candidate for this, since the center support can hide the
converter with the light itself mounted high on the rear face of the box. The two (bulb
and converter unit) must be close to each other, since the Ford assembled light and
unit have short converter-to-light wires. If installed in the upper edge of a canopy,
the unit could simply be placed along side the light or tucked inside the top edge.
First, make a simple template of the inside oval on the light's lens. This can
be done with contact paper by placing a rectangular piece of the contact paper
on the lens and cutting around the slot in the light with an exacto knife. Be
conservative, you can always remove extra material (from the truck)later. Use
either the inside or outside remainder of the paper to test fit a location for
the light. Once the desired location is identified, use a non permanent marker
or adjust the paper itself to account for the shape of the light. Note that
with a lot of movement, the contact paper will tend to stretch so be very
conservative with your cut!
Cut out the hole for the light with tin snips, a metal blade equipped sabre saw
or even a die-cutter (a.k.a. die grinder). Thicker metal or fiberglass requires
the use of either the die cutter or a scroll saw.
Test fit the light, then cut and file to remove the burrs and excess. A flat
file with a slightly rounded edge works best. Once the light slot is perfectly
cut and shaped, a bracket for the light will need to be fabricated. This can be
accomplished by removing a center section from a piece of 1" aluminum square
tubing. Anyone compentent in sheet metal work can figure out a better bracket
for this light, but the square tube version is simple and easy to fabricate.
 To make the square tube bracket for the light, first cut a piece of the 1" tube
to an overall length of 24 3/4". Then, mark a line on three sides of the tube
at 1 5/16" from each end. This will leave the ends intact with a single side
of the tube remaining in the center for bolting the light to. Cut the tube with
a scroll saw and metal blade or a pneumatic die cutter.
To make the square tube bracket for the light, first cut a piece of the 1" tube
to an overall length of 24 3/4". Then, mark a line on three sides of the tube
at 1 5/16" from each end. This will leave the ends intact with a single side
of the tube remaining in the center for bolting the light to. Cut the tube with
a scroll saw and metal blade or a pneumatic die cutter.
 Once the bracket is fabricated, it can be bolted to the light via the existing
nuts and studs on the light itself. Take measurements of the total length of
the bracket and transfer them to where the light will be mounted. There are
many ways to fasten the bracket onto the vehicle's canopy or truck box, but
blind rivets were used in this example. Carefully measure and drill for the
rivets and bracket. Then, rivet the assembly onto the vehicle.
Once the bracket is fabricated, it can be bolted to the light via the existing
nuts and studs on the light itself. Take measurements of the total length of
the bracket and transfer them to where the light will be mounted. There are
many ways to fasten the bracket onto the vehicle's canopy or truck box, but
blind rivets were used in this example. Carefully measure and drill for the
rivets and bracket. Then, rivet the assembly onto the vehicle.
Mounting the converter is just as easy, simply fabricate brackets and rivet them
onto the vehicle. Here, it is recommended that the converter is screwed onto
the bracket(s) since it may fail and have to be replaced or serviced at a later
time.
The 1" square tube was used once again in the Delta Truckbox example to mount
the converter. Here, the square tube was cut into two 2" lengths, then riveted
onto the center cross bar of the truck box through the top (not easy) at a
distance equal to the provided holes in the converter. Screws were then tapped
into the aluminum tubing to mount the converter, which was mounted warning
sticker side down.
THIS PAGE, INFO, AND PHOTOS ARE COPYRIGHT 1998 by Kris Wickstead for the `61-`71
Dodge Truck Website. No part of this page may be reproduced without
permission.
| Engines | Rust |
Common Problems | Interiors | Drivetrain
|
| Main Page | Online Response |
Part Sources |
Sweptline.org Forums |

 - Rear View
of `67 D-100 with light installed.
- Rear View
of `67 D-100 with light installed.